You can personalize your Lego® piece with text and image. If you want a room with only text or only an image, just skip the wrong steps.
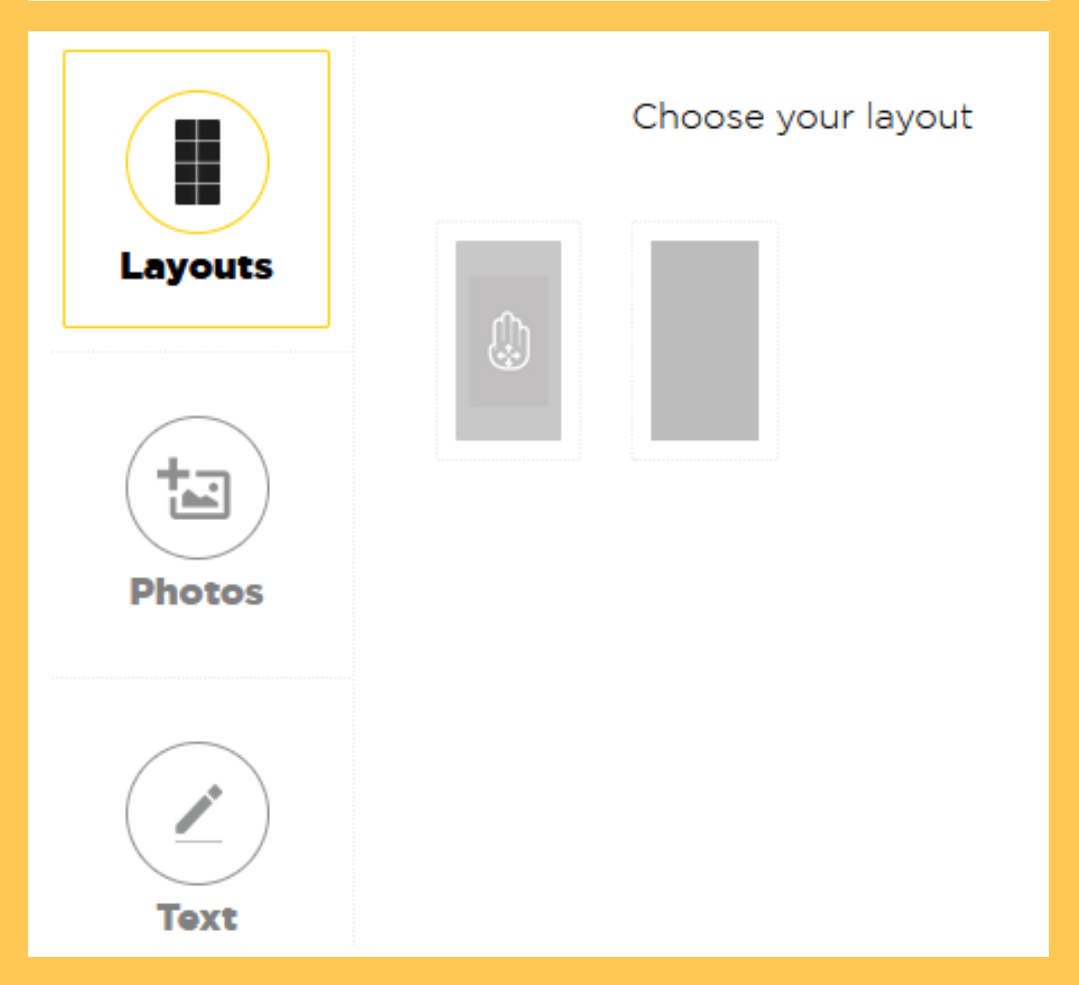
STEP 1
Choose your layout:
Free layout
You can place your elements yourself and choose their sizes. It is possible to superimpose several visuals and texts.
Automatic layout
Your image will automatically fill the surface of the room. Remember to use a visual of the right dimensions so that it does not get cut off. You will be able to add one or more text areas.
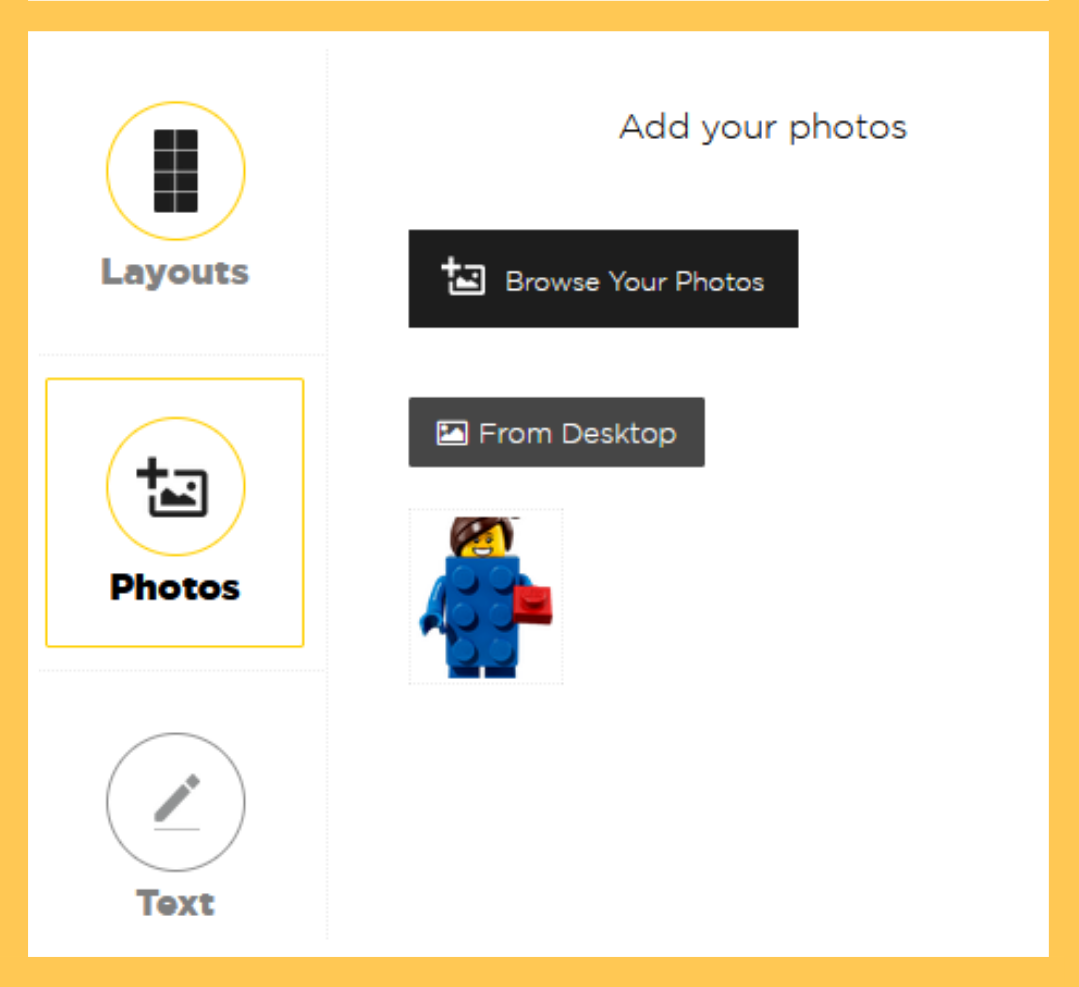
STEP 2
Import your visual and place it according to the chosen layout.
Free layout:
As explained in the first step, you can import multiple images that you can enlarge, reduce, rotate and place wherever you want on the surface.
Automatic layout:
With automatic layout, you can only import a single image. Either the image is in the format of the part and it will fill the entire surface automatically, or your image is too large and in this case you can frame the part you want to appear on your part.
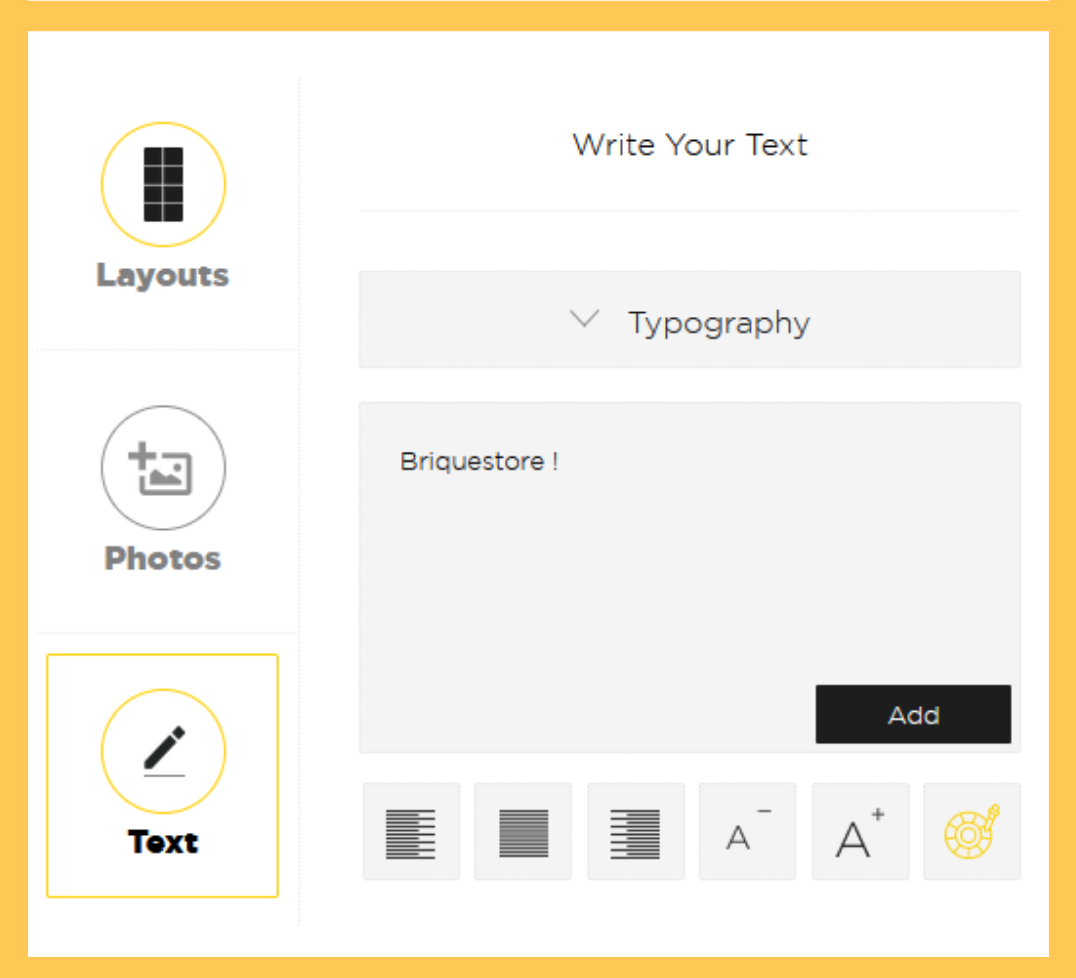
STEP 3
Add your text:To get started, choose your typeface from those available.Enter your text in the appropriate zone then click on "Add". The text will automatically appear on the surface of the part. You can move it, rotate it, enlarge it, reduce it or delete it. If you want to add additional text, just click on "new text".
Also choose the color of the text among all the colors offered.
STEP 4
Once the personalization is complete, click on "Add to cart".